
Back to all networks

Intro to Credential Harvesting
Premium roomLearn how credentials are stored, cached, and exposed in Windows and Active Directory environments.
medium
To access material, start machines and answer questions login.
Press 'Start' to begin
Please join this room to start the network
This will be enabled once the network is live. Please wait.
Can't reconnect? Try regenerating your VPN config.
When there are enough votes, the network will reset to its default state
Credential harvesting is among the most effective and commonly used tactics in offensive security assessments. Rather than relying on exploits or privilege escalation vulnerabilities, attackers frequently succeed simply by extracting credentials from where the operating system already stores them. Once you have control of a Windows machine, especially with Local Administrator permissions, you'll find that Windows is holding onto a surprising number of secrets. This room focuses on where those credentials are stored and how to extract them.
Learning Objectives
- Identify the central credential storage mechanisms in Windows and Active Directory
- Extract credentials using mimikatz and impacket
- Understand differences in output based on user privileges
- Crack hashes using Hashcat or
Prerequisites
To get the most out of this room, we recommend:
- Completing the Active Directory Basics room
- Completing the " Enumeration" rooms
- Completing the Hashing Basics room
- Completing the John the Ripper room
- Be comfortable with and CMD on Windows
Starting the Network
Before moving to the next task, click the green Start button under the network diagram. Give the network enough time to launch. You can connect to the network in two ways:
Option 1: Using the AttackBox
Click the Start AttackBox button at the top of this room. Once ready, your AttackBox will be available on the split-screen.
Option 2: Over a Connection
Alternatively, you can connect to the network via the VPN. To establish a VPN connection to this network, browse the access page, click the Networks tab, select Jr-Pentester-Intro-AD-Creds, and hit the Download configuration file button. If you don't see this file available for download, please ensure you have started the network in the room and give it a few minutes.
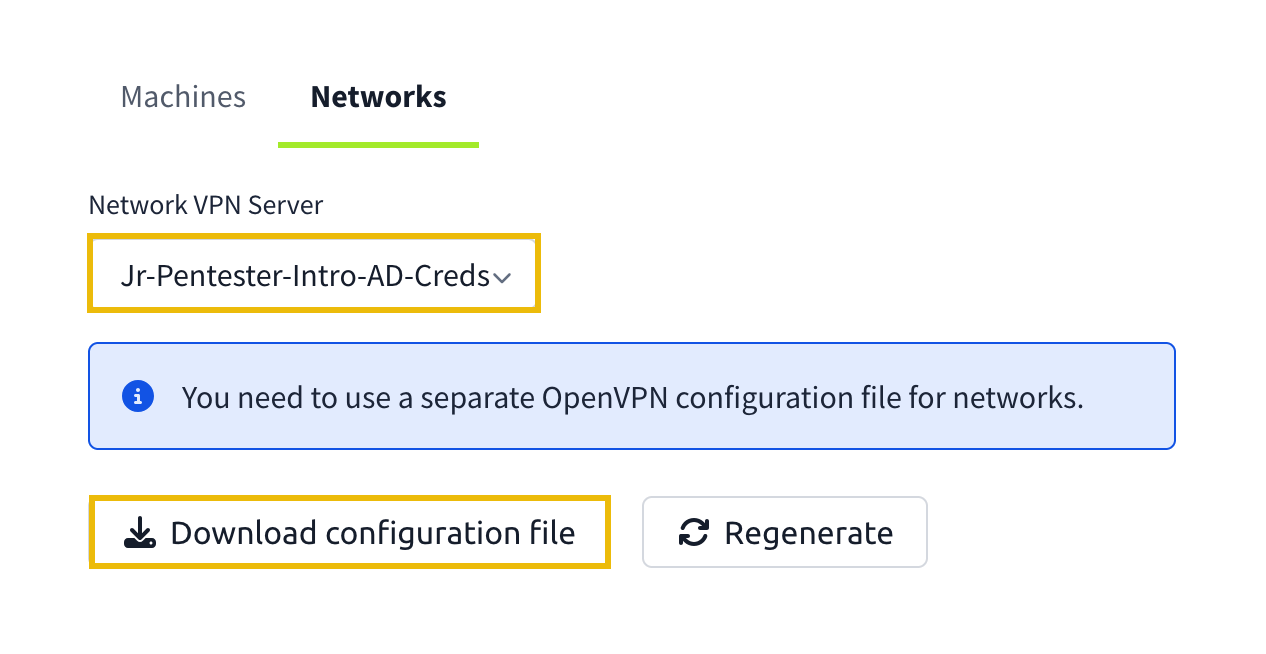
Then run the following command from the same directory where your VPN configuration file is located:
sudo openvpn [your_configuration_file_name.ovpn]
Verifying Connectivity to the Network
You can run the route command to verify that your attacker machine can communicate with the target network. The terminal below shows an example output.
Terminal
           root@tryhackme:~# route
Kernel IP routing table
Destination     Gateway         Genmask         Flags Metric Ref    Use Iface
default         10.10.0.1       0.0.0.0         UG    100    0        0 ens5
10.10.0.0       0.0.0.0         255.255.0.0     U     100    0        0 ens5
10.10.0.1       0.0.0.0         255.255.255.255 UH    100    0        0 ens5
[...]
10.220.10.0     10.250.11.1     255.255.255.0   UG    1000   0        0 tun0
10.250.10.0     0.0.0.0         255.255.255.0   U     0      0        0 tun0
[...]
Alternatively, you can use the ip route command.
Terminal
           root@tryhackme:~# ip route
default via 10.10.0.1 dev ens5 proto dhcp src 10.10.130.73 metric 100
10.10.0.0/16 dev ens5 proto kernel scope link src 10.10.130.73 metric 100
10.10.0.1 dev ens5 proto dhcp scope link src 10.10.130.73 metric 100
[...]
10.220.10.0/24 via 10.250.11.1 dev tun0 metric 1000
10.250.10.0/24 dev tun0 proto kernel scope link src 10.250.11.2
[...]
Confirm that you can see the 10.220.10.0 subnet in the command output. If it is in the output, your machine should be able to communicate with the target network. Moreover, you can use the ping command against the lab machines.
Connectivity Issues
Click on the drop-down arrow below if you cannot reach the network.
Troubleshooting Connectivity Issues
If you cannot connect to the network from your AttackBox, please open the terminal and run the following command. This will run a troubleshooting script:
Terminal
           user@tryhackme$ tryconnectme

TryHackMe's network room connection debugger, at your service!

Before we dive deeper, please make sure that you are only using the AttackBox
and do not have your network VPN profile running anywhere!

The AttackBox uses the same VPN profile as you would use on your own machine
and you are only allowed to run the VPN profile once!

If you are running in two places, stop the other VPN and restart the AttackBox please!

If you confirm that you are only using the AttackBox, press [Y], otherwise, the debugger will quit: Y
Once you have made sure that you are only connecting to the network from the AttackBox, you can enter the following IP:
Terminal
           user@tryhackme$
In the network room, look at the network diagram and please provide an IP address being shown to you there.
Format should be X.X.X.X: 10.220.10.10

Trying to ping the VPN server at 10.220.10.250...
From there, follow the instructions given by the script. When the script asks for your VPN server, enter Jr-Pentester-Intro-AD-Creds.
If you encounter any issues, please reach out to us on Discord or via email at support@tryhackme.com.
Answer the questions below
I am connected to the network
Ready to learn Cyber Security?
The Intro to Credential Harvesting room is only available for Premium or Max subscribers. Signup now to access more than 500 free rooms and learn cyber security through a fun, interactive learning environment.
Already have an account? Log in